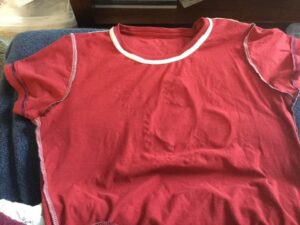
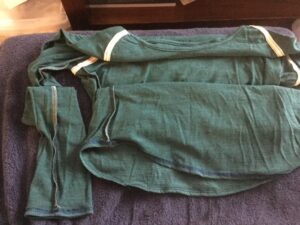
I mentioned before having a lot a shirts and socks that were *almost* wearable with my chemical allergies, except for the presence of polyester or nylon in the threads. Polyester is made with polyethylene glycol, which is a cross-reactor with my allergen propylene glycol, and nylon fibres are lubricated with an oil containing isothiazolinone(s). While the natural cotton t-shirts, wool shirts, and wool socks were a huge relief to my reactive system, the polyester and nylon seams were still causing problems, forcing me to spend weeks in inside-out cotton bath robes.
I finally received the cotton thread last week (cotton thread is expensive!), and would have been ready to start the alterations if not for the Christmas presents I’d been trying to make. I finally finished knitting on Sunday, and began to rush through my alterations before we visit family at Christmas. I sincerely doubt the in-laws would be tolerant of me wearing a bath robe all day every day.
 I started with my socks. The socks are Mongrel socks from Tasmania. They are made of wool with a small amount of cotton-wrapped elastic, and a polyester toe seam. Speaking with the manufacturer, I found that they had tried other seam materials and they tended to fail, so I knew the polyester seam couldn’t be completely removed. I decided to cover the inside of the seam with 1/2″ cotton twill tape, sewn with crochet cotton. In order to avoid losing stretch and damaging the yarns of the sock, I decided to sew by hand. I folded over the end of the twill tape to prevent unravelling, and stitched it down across the whole seam, with a backstitch. I stitched 100% around the rectangle of twill tape, then tied off my string. The result was a completely covered seam on the inside, and a few marks in a rectangle around the seam on the outside. I matched the colour of the crochet cotton to the sock colour so the seam would be less visible.
Next, I moved on to the t-shirts. The shirts were a lot more challenging than the socks, even though I was able to use a sewing machine. The most important thing here was that I used a jersey ball point needle to avoid damaging the fabric’s fibres.
- I started by basting the armhole, side, and arm seams. Then these serged seams were removed with a stitch ripper. The basting would hold everything together until I could re-serge the seams.

- All of my t-shirts had a strip of fabric of the same type as the t-shirt along the back of the neck, over top of the serged neck hole seam, so I loosened one side of that. I then sewed twill tape over the shoulder seams, around the front of the neck hole, and added extra pieces to join everything cleanly underneath the fabric at the back of the neck hole. I used a triple stitch on my sewing machine, which gave a little bit of stretch, but I learned later that I should have used the chain stitch function on my cover stitch machine.
- When one side of the twill tape and fabric cover had been sewn, I picked out the polyester stitched on the other side of the fabric cover and stitched the other side of the twill tape and fabric cover.
- After completing the neck hole and shoulder seams, I serged the arm hole and then the arm and side seam, using a four-thread overlock so that the seam would be firmly held in place. I started the side stitch just after the sleeve hem, cutting in sharply, and ended it just before the bottom hem, cutting back out just as sharply so that I wouldn’t catch the hem in the seam. The basting on the arm holes and side seams could then be removed.

- Finally, I basted the sleeve and bottom hems, just below the stitches that were already there. Then the hems could be picked out. I used my cover stitch machine to re-hem the t-shirts withcotton thread, then removed the basting.

The wool shirts were a bit different.
- I began again by basting and removing the side and arm seams, serging them back together in the same way as the t-shirts. This time, I serged the side and arm seams right away, and removed the basting.

- The wool shirts have dolman sleeves, which means that the arm hole extends down from the neckline, around the underside of the arm, and back to the neckline on the other side. These seams were coverstitched, and I didn’t want to have to take apart and sew these seams over again. I instead unpicked about one inch of the neck seam at the top of each arm hole seam. I then stitched 3/8″ cotton twill tape to the inside of these seams, starting and ending at the neck line, following the existing seams. 1/4″ would probably have been wide enough here, but I did make a number of mistakes, so perhaps it was good that I used 3/8″.
- Next was the neck. This fabric was bound with similar fabric around the entire neck hole, and stitched with a single line of stitches. I undid the stitches from one side, stitched it down again, and then removed the other side, and stitched it back down.
- Finally, I re-stitched the hems exactly as I had done for the t-shirts, except with a more narrow hem.
What did I learn?
- I learned that making garments from scratch is probably easier than trying to take apart and re-sew them, with the exception of socks.
- I learned that cotton thread is much more prone to breaking than polyester thread, and so sometimes you have to be VERY careful to avoid breaking your threads. Mercerized cotton Aurafil thread or long-staple cotton cones seem stronger than the ScanFil organic cotton thread.
- I learned that having a little help from family can help you get seven shirts completed in only a few days whereas on my own it would have taken a week or more.
- I learned that the polyester seam in the socks affected the hand I had to stuff inside the sock during sewing as much as it affects my feet. My fingers were beginning to tingle in a numb, itchy way.
- I also learned that since most tags are synthetic and sewn on as a part of the polyester seams, re-sewing the seams really helps in ridding yourself of itchy tags.
- I learned that I couldn’t use twill tape to cover my hems or side seams. If I had done so, I wouldn’t have been able to stretch the hems or sides, which would have been really uncomfortable. Luckily, I had the cover stitch machine and serger to sew them up exactly the same as they had been, except sometimes for the colour. If I didn’t have that, I would have had to use a twin needle on my regular sewing machine and the overlock function on the sewing machine. Either way, it was unfortunate that I couldn’t just sew something over top, leaving the seams in place, but they had to go.
Did I finish all of my clothing? No. I do have enough shirts for the immediate need and enough time to sew the last pair of socks on the way there (they take me about an hour a pair). Taking apart and re-sewing clothing is DEFINITELY a PITA. It’s encouraging me to make more of my own clothing sooner. Nevertheless, I am really grateful to have a few shirts and socks that I can wear again. Soon I’ll be able to work on the rest of my shirts and my PJ pants. Things are looking up.
